Devika AI is an AI agentic platform designed to facilitate the creation of AI-powered applications through a combination of cutting-edge technology and user-friendly interfaces.
This article aims to provide a detailed overview of setting up and using Devika AI based on firsthand experiences and insights shared by a developer.
Setting Up Devika AI:
The initial setup process for Devika AI involves installing dependencies, configuring settings, and launching the development environment. This typically includes installing required packages, setting up configuration files, and starting the front-end and back-end servers.
1. Installing Dependencies:
The installation process begins with installing the necessary dependencies, which may include packages for Python, JavaScript, and other programming languages depending on the project requirements.
This step ensures that all required libraries and frameworks are available for development.
2. Configuring Settings:
Once the dependencies are installed, the next step is to configure the settings for the Devika AI environment.
This involves setting up configuration files, such as the config.toml file, where API keys and other sensitive information may be stored securely.
3. Launching the Development Environment:
With the dependencies installed and settings configured, developers can launch the Devika AI development environment by starting the front-end and back-end servers.
This allows for seamless interaction with the platform’s features and capabilities.
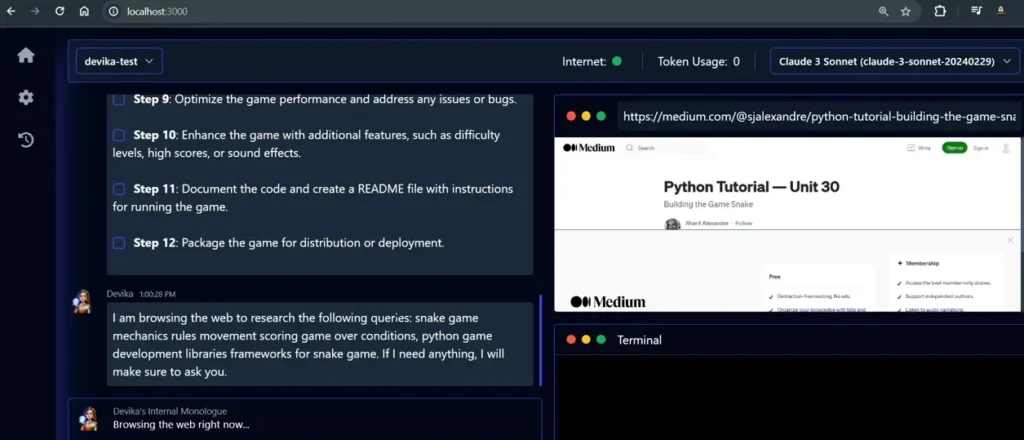
4. Creating Projects with Devika AI:
Once the setup process is complete, developers can begin creating projects with Devika AI. This involves defining project goals, selecting appropriate AI models and algorithms, and implementing the necessary code to achieve the desired functionality.
5. Defining Project Goals:
The first step in creating a project with Devika AI is to define clear and achievable project goals.
This includes identifying the problem to be solved, determining the target audience, and outlining the desired outcomes of the project.
6. Selecting AI Models and Algorithms:
Devika AI offers a wide range of pre-trained AI models and algorithms that can be used to power various applications.
Developers can choose from a selection of models for natural language processing, image recognition, sentiment analysis, and more, depending on the requirements of their project.
7. Implementing Code:
With project goals defined and AI models selected, developers can begin implementing the necessary code to build their application.
This may involve writing custom scripts, integrating third-party APIs, or leveraging Devika AI’s built-in tools and functionalities to streamline the development process.
8. Debugging and Iterating:
Throughout the development process, developers may encounter bugs, errors, or unexpected behavior in their code. Devika AI provides tools and resources for debugging and troubleshooting issues, allowing developers to identify and resolve problems quickly and efficiently.
Additionally, developers can iterate on their projects, making improvements and enhancements based on feedback and testing results.
Conclusion:
Devika AI offers developers a powerful and versatile platform for building AI-powered applications. By following the setup process outlined in this article and leveraging the platform’s features and capabilities, developers can create innovative and impactful projects that push the boundaries of AI technology.